(recommended book, the Delft Design Guide)
Faculty
Jaap Daalhuizen (design thinking), Paul Hekkert (form theory), Pieter Jan Stappers (techniques), Jelle Zijlstra (didactics), Matthijs va Dijk (applied), Carlos Cardoso (fixation), Stefan va de Geer (concept dev and eval), Koos Eissen (sketching), Jan Buijs (creativity), Annemiek van Boeijen (culture), and student tutors Koen and Iris.
Course Notes:
The Delft approach to design consists of 6 steps occurring throughout a 'design cycle': Discover, Define, Design, Deliver; and that design is always iterative.
Annemiek van Boeijen clarifies that this should not be understood as some kind of mechanical loop. The process is in fact often chaotic, with ideas diverging and converging at different times. Iterative implies that we expect activities to repeat, that stages may occur in different sequences, that activities and phases may even overlap.
The Delft Design Guide asserts that:
A designerly orientation to the world is a kind of continuing questioning. Paul Hekkert refers to a way of 'seeing' the world as a way of noticing how products are used and the contexts from which they were developed. A shorthand for this approach is "why, how, what".
When analysing an existing product we ask 'why' it is the way it is, how it came to be. This is called the context level. Addressing these questions requires an understanding of the product's context and history. This is is an analytical process we call 'deconstruction', a kind of 'unpacking' the understandings, assumptions (implicit, explicit), conditions etc. that aligned to bring the original product into existence. Similar factors in turn precondition the bringing into existence of a new product.
When using a product we become involved in the 'how', the doing of using it. This is the 'interaction' level of analysis. The 'why' informs 'how' the product works, how it is used, how the work it does is achieved. The third analysis is 'what', that is the intention users have in using the product, what goals they achieve through using it. They refer to this as the product level, typically driving the development of a new product.
Overlapping with these questioning stances is an experiential orientation towards action which is an essential part of being a designer. Designerly action is stimulated by a feeling of 'urgency to act'. The urgency to act is aroused when "we reason from WHY, via HOW, to WHAT. The designer's action is to create the 'what'." (Paul Hekkert, original emphasis)
My own design process sketch tries to bring something of the recursive/chaotic character of design, but not random, conveying that design is most definitely deliberate action, although a journey where the destination is not yet known.
By way of explanation: I adopt an orthogonal depiction in which direction changes convey design 'pivots', rather like the business term, where the objective shifts tangentially. The little boxes are intended to convey growing competence or knowledge of a particular area. The 'microcosm box' is a miniature of the larger diagram, intended to suggest the recursive nature of iterations with no real beginning or end as such.
The diagram is oriented in the overall shape of a backwards C in opposition to characteristic left to right progression characterising depictions of temporality that dominate the contemporary culture (a Western tradition?). I think it is important too to acknowledge the 'negative space' left by the contained and directed elements of the diagram. You may think of the negative space as 'the unknown'. I can read a similar interpretation in the negative space left by Newman's 'Design Squiggle' too.
Jaap Daalhuizen states that for a designer from Delft "designing is a verb first and a noun second". The gerund form of design and many of the other activities of design indicates that the process, creative problem solving, is a basic philosophy behind their approach. It involves, at different points, keeping control, releasing (losing) control, periods of sustaining certainty and then other periods where uncertainty is valued and emphasised. There are examples of oscillations between opposing conditions, what we might characterise as different kinds of tight-loose attitudes.
Paul Hekkert emphasises the fact that everything around us is designed, our houses, our environments, the cities we live in, the things we use. Whether these products, objects and things are designed well or not is another question, regardless they have been designed at some level, and furthermore we all experience and interpret the things.
We can consider the characteristics of extant objects at three distinct levels: what, how, why.
The 'what' level is concerned with so called objective aspects, for example the factual characteristics.
The 'how' level deals with explanation, our own mental models and design models, the mechanics of how objects respond to/in use. This involves an initial kind of unpacking of the object, a deconstruction of it (ideationally) and positing interpretations of how things happen.
The 'why' level is the level of broader context, understanding reasons why things are the way they are, what makes things meaningful).
All together these levels are an approach to design deconstruction, deconstruction of the designed object. This is simply a technique for interpreting, one of the approaches or tools of a 'design attitude'. We use this to consciously unpack experience. It is necessary because we don't always confront designs in a direct manner. However, through introspection and deconstruction we learn to identify, describe and unpack the ways that we feel and think about designed things. It is an analytical approach to gaining understanding of why things are the way they are.
The 'design process' is presented in symmetry with deconstruction. A design orientation involves a process built on knowledge established through deconstruction of extant objects. The design process is action as a mirror to design deconstruction.
In describing how deconstruction shifts naturally to designing Hekkert describes a designery feeling of "a sense of urgency", a desire to act, to change something, to alter the scene in order to learn or to improve the experience of using or interaction with these objects. The design process, design action, quickly becomes complicated because so many relevant factors must be brought into to play, to to understand, to explain, to justify, to use, to change, to act, to adapt etc. Designers inevitably respond to and draw upon factors from multiple domains; technology push, market pull, user centred needs. Each domain is comprised of and utilises many different factors. The designer's job is to focus on what is relevant and interesting. This job is, in part, an artful selective use of these factors and tools, used in order to obtain greater understanding, evidence, to test, to reason and appreciate the effect and affect of new designs.
References and further reading:
Buijs, J. (2012). The Delft Innovation Method: a design thinker’s guide to innovation. Eleven International Publishing, The Hague.
Annemiek van Boeijen clarifies that this should not be understood as some kind of mechanical loop. The process is in fact often chaotic, with ideas diverging and converging at different times. Iterative implies that we expect activities to repeat, that stages may occur in different sequences, that activities and phases may even overlap.
The Delft Design Guide asserts that:
Products are just a means for accomplishing appropriate actions, interactions and relationships; products provide meaning for people only through interaction. (Buijs, 2012, p27)In essence, products and services don't exist for their own benefit, they are tools through which people achieve their goals by interacting with the products.
When analysing an existing product we ask 'why' it is the way it is, how it came to be. This is called the context level. Addressing these questions requires an understanding of the product's context and history. This is is an analytical process we call 'deconstruction', a kind of 'unpacking' the understandings, assumptions (implicit, explicit), conditions etc. that aligned to bring the original product into existence. Similar factors in turn precondition the bringing into existence of a new product.
When using a product we become involved in the 'how', the doing of using it. This is the 'interaction' level of analysis. The 'why' informs 'how' the product works, how it is used, how the work it does is achieved. The third analysis is 'what', that is the intention users have in using the product, what goals they achieve through using it. They refer to this as the product level, typically driving the development of a new product.
Overlapping with these questioning stances is an experiential orientation towards action which is an essential part of being a designer. Designerly action is stimulated by a feeling of 'urgency to act'. The urgency to act is aroused when "we reason from WHY, via HOW, to WHAT. The designer's action is to create the 'what'." (Paul Hekkert, original emphasis)
The 'Design Squiggle' by Damian Newman.
Evocative. http://ow.ly/SQGj4My own design process sketch tries to bring something of the recursive/chaotic character of design, but not random, conveying that design is most definitely deliberate action, although a journey where the destination is not yet known.
 |
| One of my visualisations of the design process |
The diagram is oriented in the overall shape of a backwards C in opposition to characteristic left to right progression characterising depictions of temporality that dominate the contemporary culture (a Western tradition?). I think it is important too to acknowledge the 'negative space' left by the contained and directed elements of the diagram. You may think of the negative space as 'the unknown'. I can read a similar interpretation in the negative space left by Newman's 'Design Squiggle' too.
Framing Devices
Delft employ framing devices to establish individual practices and orientation that may be called the 'design attitude', e.g. from objects (describing) what, how, why = deconstruction -> design process or 'designing' = future context, interaction, new object. Technology push, market pull, user centred.Jaap Daalhuizen states that for a designer from Delft "designing is a verb first and a noun second". The gerund form of design and many of the other activities of design indicates that the process, creative problem solving, is a basic philosophy behind their approach. It involves, at different points, keeping control, releasing (losing) control, periods of sustaining certainty and then other periods where uncertainty is valued and emphasised. There are examples of oscillations between opposing conditions, what we might characterise as different kinds of tight-loose attitudes.
Paul Hekkert emphasises the fact that everything around us is designed, our houses, our environments, the cities we live in, the things we use. Whether these products, objects and things are designed well or not is another question, regardless they have been designed at some level, and furthermore we all experience and interpret the things.
We can consider the characteristics of extant objects at three distinct levels: what, how, why.
The 'what' level is concerned with so called objective aspects, for example the factual characteristics.
The 'how' level deals with explanation, our own mental models and design models, the mechanics of how objects respond to/in use. This involves an initial kind of unpacking of the object, a deconstruction of it (ideationally) and positing interpretations of how things happen.
The 'why' level is the level of broader context, understanding reasons why things are the way they are, what makes things meaningful).
All together these levels are an approach to design deconstruction, deconstruction of the designed object. This is simply a technique for interpreting, one of the approaches or tools of a 'design attitude'. We use this to consciously unpack experience. It is necessary because we don't always confront designs in a direct manner. However, through introspection and deconstruction we learn to identify, describe and unpack the ways that we feel and think about designed things. It is an analytical approach to gaining understanding of why things are the way they are.
The 'design process' is presented in symmetry with deconstruction. A design orientation involves a process built on knowledge established through deconstruction of extant objects. The design process is action as a mirror to design deconstruction.
In describing how deconstruction shifts naturally to designing Hekkert describes a designery feeling of "a sense of urgency", a desire to act, to change something, to alter the scene in order to learn or to improve the experience of using or interaction with these objects. The design process, design action, quickly becomes complicated because so many relevant factors must be brought into to play, to to understand, to explain, to justify, to use, to change, to act, to adapt etc. Designers inevitably respond to and draw upon factors from multiple domains; technology push, market pull, user centred needs. Each domain is comprised of and utilises many different factors. The designer's job is to focus on what is relevant and interesting. This job is, in part, an artful selective use of these factors and tools, used in order to obtain greater understanding, evidence, to test, to reason and appreciate the effect and affect of new designs.
References and further reading:
Buijs, J. (2012). The Delft Innovation Method: a design thinker’s guide to innovation. Eleven International Publishing, The Hague.
The Morning Rituals Project
Over the course we develop an overall design project addressing the theme 'morning rituals'.
My notes on 'morning rituals'
My own morning ritual
The alarm goes off, throw off the covers, bathroom, brush teeth and shave, warm-up routine, make the bed, make sure the kids are awake and getting ready, get dressed, breakfast, go to work.
Open the office, start the computer, check email, respond, start work tasks. Get a cup of tea and complete more work tasks.
On the physiology of sleep/wake cycles
Our bodies respond to the transition from dark to light, the dawning of the day. No matter what time we go to sleep our bodies respond to the morning. Light stimulates cells in our retinas that in turn stimulating our brain and establish the circadian rhythm. The circadian rhythm is an endogenous cycle of biological activity synchronised with the day/night cycle. The retinohypothamic (RHT) tract is a photic (in relation to light) neural pathway that carries these light=day/dark=night signals to the suprachiasmatic nucleus (SCN) region of the brain. The SCN in turn plays a role in regulating our sleep/awake cycles. As it turns dark outside the RHT signals the SCN which then triggers the pineal gland (PG) to release melatonin, a hormone that prepares us for sleep. Waking up reverses this process. Interestingly the colour composition of the light matters; daylight equivalent is best at triggering melatonin release. In response to the issue of bright LED lighting ruining people's sleep cycles (link) night shift mode on iPhone changes the colour balance of the screen from bright blue/white to a softer yellow/white illumination (link).References and further reading:
* brainpickings.org by Maria Popova
* Joe Hanson's video: Why do we have to sleep, and how did it evolve in the first place? https://youtu.be/3mufsteNrTI via @okaytobesmart
* Scientific American topic and article "Can Napping Make Us Smarter"
* Social jet-lag or sleep intertia
Notes on a product for morning rituals
Improve on the LED Pillow Clock or a pillow that lights up?Why not combine a pillow light with a sleep cycle stage sensor?
Associations
transitions, still tired, restarting

Discussions with others
I found the discussion posts to be really informative, more than just the usual, people are genuinely different, different habits, different rituals, different approaches. So many people do things just plain differently to each other, so much variation in approaches, in what people do, when and where they do it. Different priorities, sequences, orders. Different objects and arrangements.
My morning feelings
 |
| My words for feelings, weekend mornings... |
 |
| Weekday feelings... |
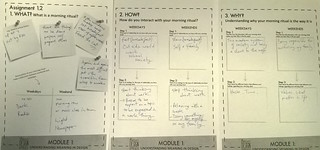 |
| The 'what', 'how' and 'why' |
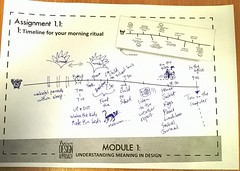 |
| The timeline of a morning |